Sybase Install
Step 1
Download the following install media
FTS 2.0 – Download FTS 2.0
FTS 2.8 – http://www.nuchaltrans.edu.au/fts/setup_2_8_0.exe OR FTS 2.8.1 if you have upgraded – Download FTS 2.8
Step 2
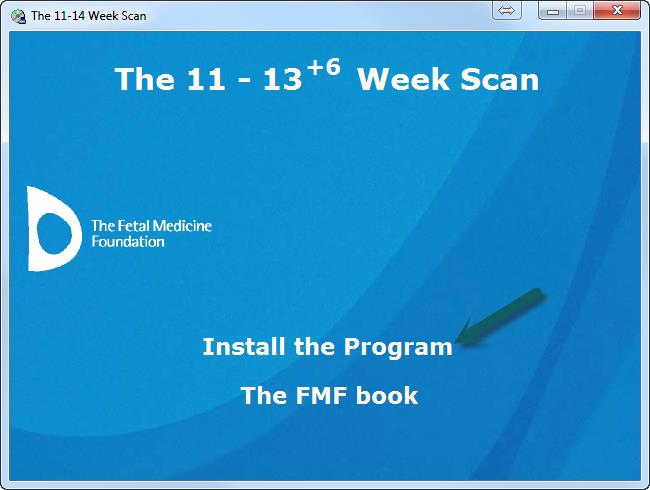
Open the fmf_cd.zip file downloaded in step 1, run the “autorun.exe” file and choose “Install the Program” and select “Next” or “Install” at all the following prompts
Step 3
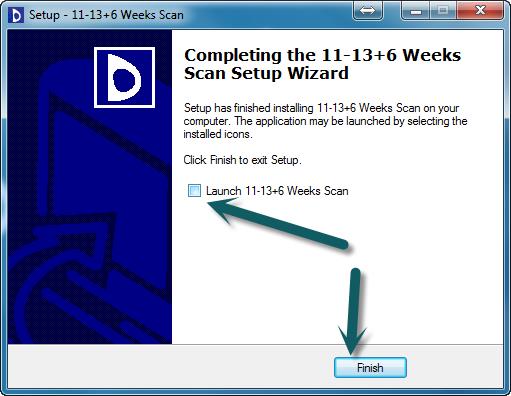
Once the installation is complete unselect “Launch 11-13+6 Weeks Scan” and click “Finish”
Step 4
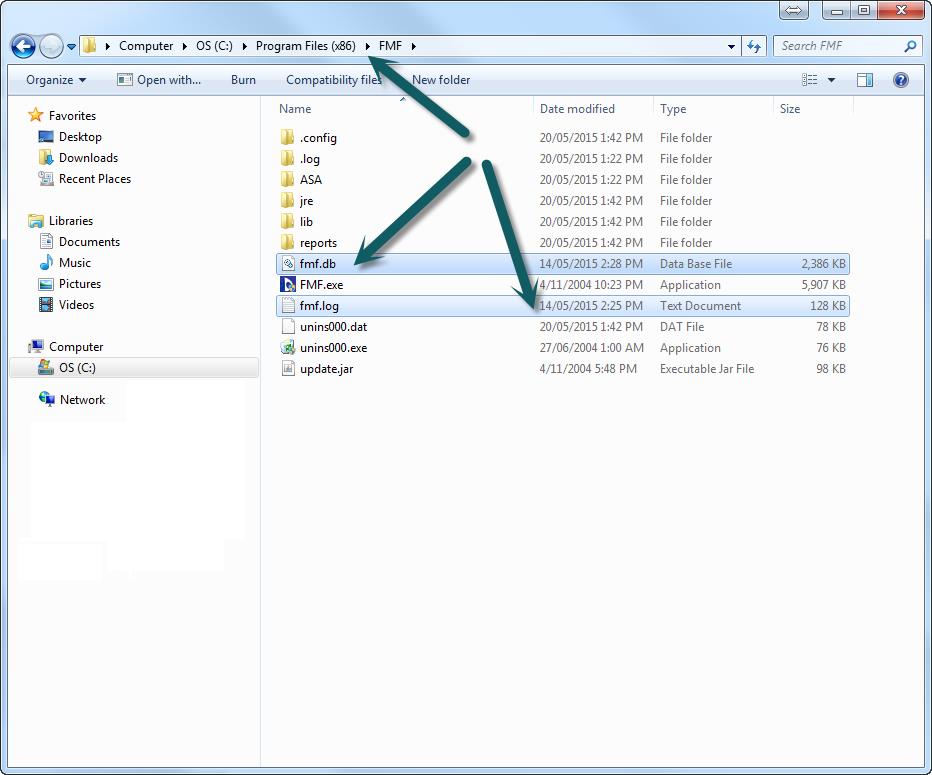
Copy the files “fmf.db” and “fmf.log” from backups into c:\program files (x86)\fmf
Step 5
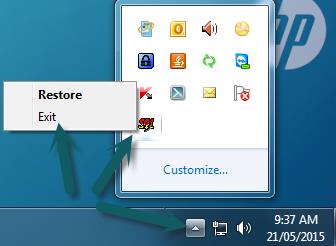
Ensure FTS is closed including the “SQL” icon in the system tray
Step 6
Open the Setup_2_8_0.exe file downloaded in step 1 and select “Next” or “Install” at all the following prompts
Step 7
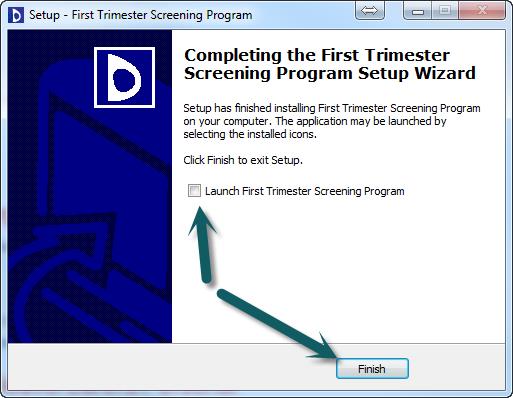
Once the installation is complete unselect “Launch First Trimester Screening Program” and click “Finish”
Step 8
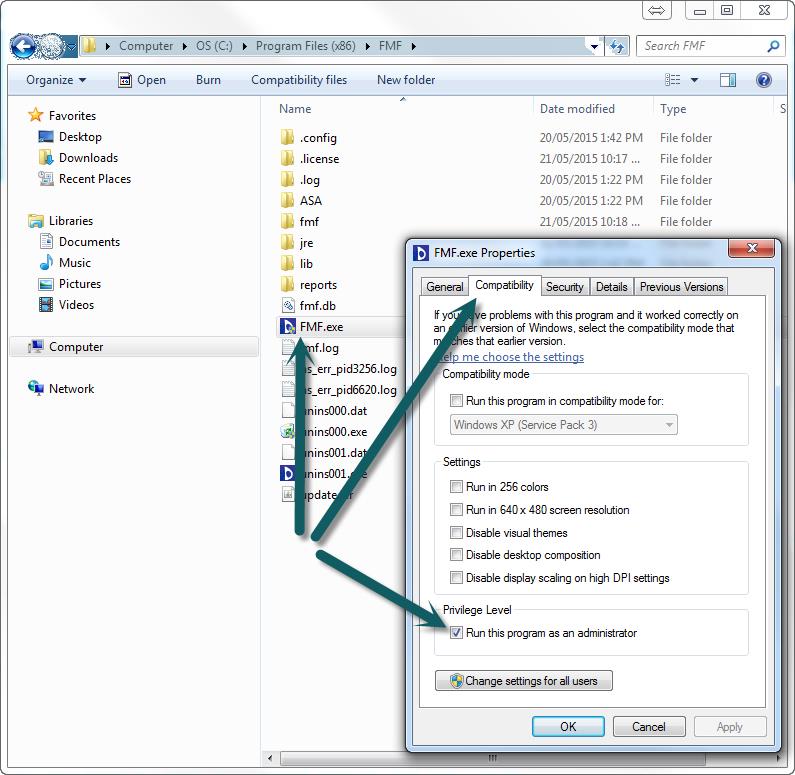
Browse to C:\Program Files (x86)\FMF, right click on FMF.exe and choose properties, select the Compatibility menu and select the “Run this program as an administrator” and click OK. Run the application from your desktop or Start menu.
Step 9
A prompt may appear asking to upgrade the database, click “Yes”

Step 10
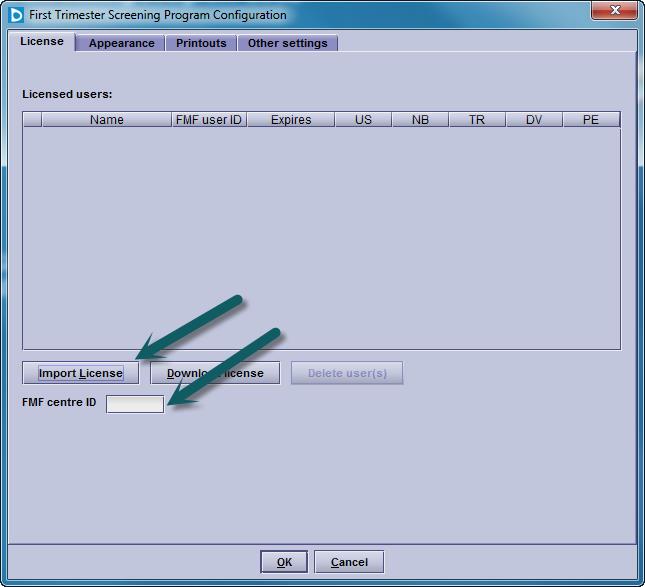
The License screen will pop up the first time you run the program, but can also be accessed manualy from the “Options” button on the home screen. Enter your Center ID and import your existing license using the “Import License” button
Step 11
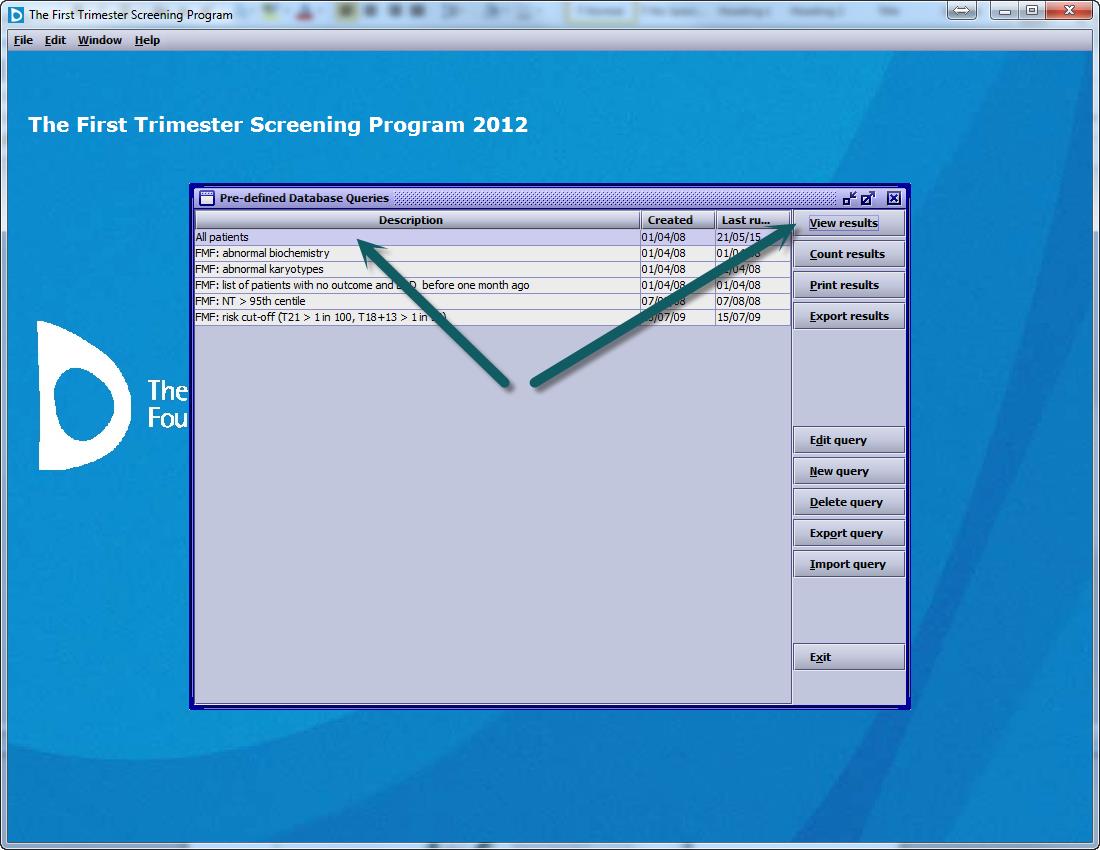
Confirm installation and data import has been successfully completed by choosing Queries from the home screen and then clicking “View Results” with “All Patients Selected”
Step 12
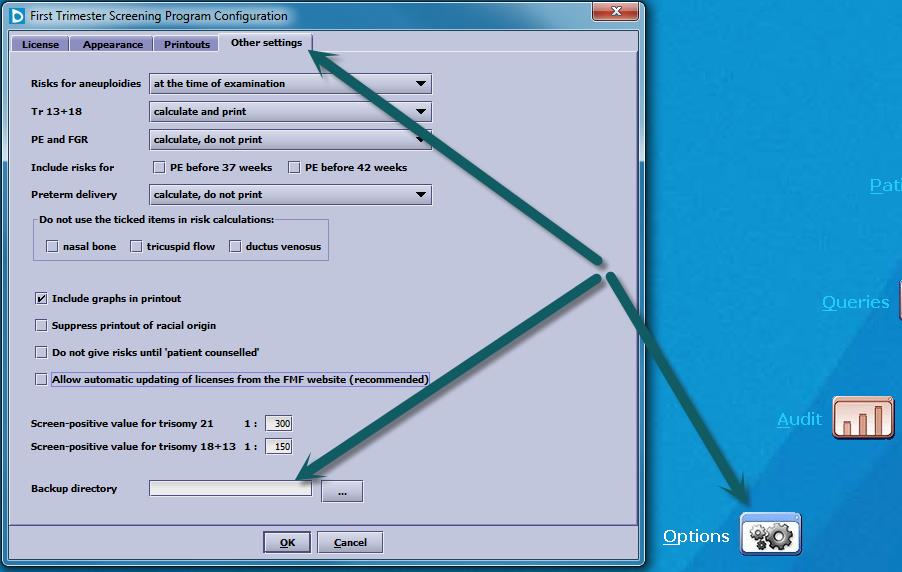
Set a backup location by clicking the Options on the home screen and then the “Other Settings” menu ensuring a location other than the local hard disk is selected.
